
As I stood in my kitchen, the warm sunlight filtering through the window, I felt a wave of nostalgia wash over me. I could almost hear my grandmother’s laughter and the clinking of her mixing bowls as she whisked ingredients with love and precision. For her, bread-making was not just a chore; it was an art—a delightful ritual that filled our home with warmth and comfort. Today, I find myself inspired to recreate that magic with my own version of Soft & Fluffy Homemade Sandwich Bread—a recipe that promises to be a cozy hug in bread form.
Imagine the smell of freshly baked bread wafting through your home, inviting everyone to gather around the kitchen. It’s not just about the bread; it’s about the memories we create while sharing it with loved ones. Whether it’s a luscious sandwich with your favorite fillings or simply toasting a slice with a pat of butter, this bread is bound to become a staple in your home.
Recipe Timing
- Prep Duration: 20 minutes
- Active Cooking: 40 minutes
- Total Duration: 2 hours 30 minutes (including rise time)
- Portion Size: 12 slices
- Complexity: Simple
Nutritional Recipe
- Calories per portion: Approximately 130
- Protein: 4 grams
- Carbs: 24 grams
- Fats: 2.5 grams
- Fiber: 1 gram
- Sugars: 2 grams
- Sodium: 125 mg
Why You’ll Love This Soft & Fluffy Homemade Sandwich Bread
This bread is bound to become your go-to recipe for several reasons. Its soft, fluffy texture makes it perfect for sandwiches, and the subtle sweetness from the honey offers a delightful twist that elevates the flavor. The combination of whole wheat and all-purpose flour makes it a tad healthier while still yielding a light texture. Plus, the satisfaction of saying you baked your own bread can’t be beaten!
The Complete Cooking Journey
Baking bread is a journey that intertwines simple ingredients with the alchemy of time and temperature. You’ll begin by gently melting butter, inviting warm milk and honey to mingle, before introducing that magic dust—yeast. The transformation from dry flour to soft dough through kneading is a tactile pleasure. And as the dough rises, you’ll feel the anticipation build, eager to taste the fruits of your labor. Finally, the warm, golden loaf emerges from the oven, promising joy in each slice.
Ingredients:
- 3 tablespoons unsalted butter (45 grams), melted
- ½ cup milk (118 grams)
- 2 tablespoons honey (40 grams)
- 2/3 cups warm water (157 grams)
- 2 teaspoons instant or active dry yeast (8 grams)
- 1/2 cup whole wheat flour (70 grams)
- 2 1/2 cups all-purpose flour (350 grams)
- 1 ½ teaspoons kosher salt (8 grams)
- 2 tablespoons rolled oats, roughly chopped, for topping
Method:
Step 1: Melt the Butter
In a small saucepan, melt the butter over low heat to ensure it doesn’t burn.
Step 2: Combine Wet Ingredients
In a mixing bowl, combine the melted butter with warm milk, honey, and warm water. Sprinkle the yeast over the mixture and let it sit for a few minutes until foamy.
Step 3: Mix Dry Ingredients
In another bowl, whisk together the whole wheat flour, all-purpose flour, and kosher salt.
Step 4: Combine Mixtures
Gradually add the dry ingredients to the wet mixture, stirring until combined.
Step 5: Knead the Dough
Turn the dough out onto a floured surface or use a stand mixer. Knead the dough for about 8 minutes until it feels smooth and stretchy.
Step 6: First Rise
Shape the kneaded dough into a boule (a round shape) and place it in a bowl covered with a towel. Allow it to rise for 1 hour or until doubled in size.
Step 7: Shape the Loaf
After rising, punch down the dough gently, then shape it into a loaf. Place it into a greased loaf pan and cover it with a towel again. Let it rise for another hour.
Step 8: Preheat the Oven
While the dough rises for the second time, preheat your oven to 350°F (175°C).
Step 9: Prepare for Baking
Once the dough has risen, brush the top of the loaf with water. If you like, sprinkle the chopped oats on top for added texture.
Step 10: Bake
Bake the loaf in the preheated oven for 35-37 minutes, or until golden brown and the internal temperature reaches 190°F (88°C).
Step 11: Cool the Bread
Allow the bread to cool on a rack for at least 90 minutes before slicing. This step is crucial for developing the best texture.
Serving Suggestions & Pairings
This soft, fluffy sandwich bread is incredibly versatile! Serve it fresh with butter, spread a generous layer of avocado, or make a classic peanut butter and jelly sandwich. Try it with a hearty soup or serve it alongside a salad for a complete meal. You could even turn it into a delightful French toast for a weekend breakfast!
Storage & Leftovers Guide
Homemade bread is best enjoyed fresh, but you can store it in an airtight container at room temperature for up to 3 days. To keep it longer, slice it and freeze the pieces separately. It will last for about 3 months in the freezer. Just pop a slice in the toaster when you’re ready to enjoy it!
Kitchen Wisdom & Success Tips
- Tip: Ensure your yeast is fresh and active. Always check the expiration date or test its activity by dissolving it in warm water with a pinch of sugar—if it bubbles after a few minutes, you’re good to go!
- Tip: Allow the bread to cool fully before slicing to prevent a gummy texture.
Flavor Variations & Adaptations
Feel free to experiment! Add herbs like rosemary or thyme for an aromatic twist, or fold in some shredded cheese, seeds, or dried fruits for unique flavors. You can also substitute the honey with maple syrup or agave for a different sweetness profile.
Reader Questions & Solutions
-
Q: My bread didn’t rise. What did I do wrong?
- A: Check your yeast’s freshness and the temperature of your liquids; they should be warm but not hot. Ideally, they should be around 110°F (43°C) to activate the yeast.
-
Q: Can I use all whole wheat flour?
- A: Yes, but it will result in a denser loaf. You might want to add a bit more liquid to compensate.
-
Q: Why is my bread crumbly?
- A: This may be due to too much flour or not enough moisture. Ensure you’re measuring accurately and consider adding a bit more liquid.
-
Q: How can I tell if my bread is done?
- A: The bread should be golden brown, and if you tap the bottom, it should sound hollow. An instant-read thermometer should read 190°F (88°C).
-
Q: How can I adjust the sweetness?
- A: You can decrease the amount of honey based on your taste preferences, or try adding dried fruits for natural sweetness.
Wrapping Up
Baking this Soft & Fluffy Homemade Sandwich Bread isn’t just about making food; it’s about forging connections with our memories and our loved ones. As you knead and shape the dough, take a moment to relish the process, knowing that each loaf tells a story of love and warmth. So roll up your sleeves, embrace the flour-smeared countertops, and let the smell of freshly baked bread fill your home. Happy baking!
PrintSoft & Fluffy Homemade Sandwich Bread
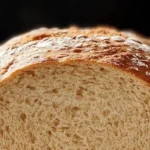
Recreate the warmth and comfort of homemade bread with this soft and fluffy sandwich bread recipe, perfect for any filling or simply toasted.
- Prep Time: 20 minutes
- Cook Time: 40 minutes
- Total Time: 150 minutes
- Yield: 12 slices 1x
- Category: Bread
- Method: Baking
- Cuisine: American
- Diet: Vegetarian
Ingredients
- 3 tablespoons unsalted butter (45 grams), melted
- ½ cup milk (118 grams)
- 2 tablespoons honey (40 grams)
- 2/3 cups warm water (157 grams)
- 2 teaspoons instant or active dry yeast (8 grams)
- ½ cup whole wheat flour (70 grams)
- 2 ½ cups all-purpose flour (350 grams)
- 1 ½ teaspoons kosher salt (8 grams)
- 2 tablespoons rolled oats, roughly chopped, for topping
Instructions
- Melt the butter in a small saucepan over low heat until it doesn’t burn.
- Combine the melted butter, warm milk, honey, and warm water in a mixing bowl. Sprinkle the yeast over the mixture and let it sit for a few minutes until foamy.
- Mix the whole wheat flour, all-purpose flour, and kosher salt in another bowl.
- Combine the dry ingredients with the wet mixture, stirring until integrated.
- Knead the dough on a floured surface or with a stand mixer for about 8 minutes until smooth and stretchy.
- First rise: shape the dough into a boule and place in a bowl covered with a towel to rise for 1 hour or until doubled in size.
- Shape the loaf by punching down the dough gently, then putting it into a greased loaf pan and covering it again. Let it rise for another hour.
- Preheat your oven to 350°F (175°C) while the dough rises for the second time.
- Prepare for baking by brushing the top of the loaf with water and sprinkling chopped oats on top.
- Bake the loaf in the preheated oven for 35-37 minutes, or until golden brown and the internal temperature reaches 190°F (88°C).
- Cool the bread on a rack for at least 90 minutes before slicing.
Notes
Ensure your yeast is fresh for the best results. Allow bread to cool fully before slicing to avoid a gummy texture.
Nutrition
- Serving Size: 1 slice
- Calories: 130
- Sugar: 2g
- Sodium: 125mg
- Fat: 2.5g
- Saturated Fat: 1g
- Unsaturated Fat: 1.5g
- Trans Fat: 0g
- Carbohydrates: 24g
- Fiber: 1g
- Protein: 4g
- Cholesterol: 5mg