
When I think of home and comfort, I’m instantly transported back to my grandmother’s cozy kitchen, where the air was always infused with the warm scent of freshly baked bread. The highlight was her Irish Soda Bread, a simple yet enchanting loaf that brought the whole family together around the table. The exterior was golden, with a rustic crust that cracked gently when sliced, revealing a soft, pillowy interior. Every bite was a reminder of tradition, love, and that age-old saying: good food is meant to be shared.
For those of you who’ve yet to experience the joy of making Irish Soda Bread, now is your chance! This delightful recipe is perfect for anyone, regardless of baking skill. Whether you’re a novice in the kitchen or a seasoned pro, you’ll find a connection to this classic bread.
Recipe Timing
- Prep Duration: 15 minutes
- Active Cooking: 35 minutes
- Total Duration: 50 minutes
- Portion Size: Serves 8
- Complexity: Simple
Nutritional Recipe
- Calories per portion: Approximately 170
- Protein: 5g per serving
- Carbs: 29g per serving
- Fats: 5g per serving
- Fiber: 1g per serving
- Sugars: 1g per serving
- Sodium: 290mg per serving
Why You’ll Love This Irish Soda Bread
Irish Soda Bread is not your average loaf. This creation is quick, straightforward, and uses just a handful of ingredients that you likely already have in your pantry. The tangy buttermilk cuts through the richness of the melted butter, creating a beautiful balance that makes every bite downright addictive. Plus, it’s an excellent bread for slathering with butter and jam, making it an ideal companion for breakfast, brunch, or a cozy afternoon snack. It’s as versatile as it is delightful!
The Complete Cooking Journey
Let’s take a journey together as we whip up this charming loaf from scratch. This recipe invites you to engage with your ingredients in a way that’s not just about baking but about creating something meaningful. Picture yourself measuring flour, mixing the dough, and finally watching it rise beautifully in the oven, turning golden brown, filling your kitchen with a homey warmth that feels like a hug.
Ingredients:
- 4 cups all-purpose flour
- 1 teaspoon baking soda
- 1 teaspoon salt
- 1 3/4 cups buttermilk
- 2 tablespoons sugar
- 2 tablespoons melted butter
Method:
Step 1: Preheat and Prepare
Preheat your oven to 425°F (220°C). Grease a baking sheet or line it with parchment paper to ensure your bread doesn’t stick. The next step is setting the stage for your delicious creation!
Step 2: Mix the Dry Ingredients
In a large bowl, combine the all-purpose flour, baking soda, salt, and sugar. This is where our bread starts to take shape. Mixing these dry ingredients first ensures that the baking soda and salt are evenly distributed throughout the loaf.
Step 3: Create a Well and Add Wet Ingredients
Make a well in the center of the dry ingredients and pour in the buttermilk and melted butter. The liquid will help draw the flour together, leading us into the next delightful step.
Step 4: Form the Dough
Mix until a soft dough forms. You might want to use your hands as you combine; it’s often the best tool for feeling the texture of the dough. It should be slightly sticky but come together nicely.
Step 5: Knead the Dough Gently
Turn the dough out onto a floured surface and knead gently for about 30 seconds. We’re not aiming for perfection here—just enough kneading to bring everything together without overworking it.
Step 6: Shape the Loaf
Shape the dough into a round loaf and place it on the prepared baking sheet. This round shape is not just traditional but allows for a consistent bake.
Step 7: Score the Top
Cut a deep cross into the top of the dough with a sharp knife. This step isn’t just for show; it helps the bread to rise beautifully as it bakes, giving it that classic look.
Step 8: Bake to Perfection
Bake for 30-35 minutes or until the bread is golden brown and sounds hollow when tapped on the bottom. This is the magic moment where your kitchen will be filled with the irresistible aroma of baking bread.
Step 9: Cool Before Slicing
Let it cool on a wire rack before slicing. This wait might be the hardest part, but it’s essential to let the steam escape and the loaf set properly. When it comes to serving, do it warm, in all its glory, with butter and jam.
Serving Suggestions & Pairings
Serve this Irish Soda Bread warm right from the oven or toasted for a delightful breakfast. Pair it with homemade jam, a dollop of fresh butter, or even alongside a hearty soup for a comforting meal that nourishes both body and soul.
Storage & Leftovers Guide
Store any leftovers wrapped in plastic or in a bread box at room temperature for up to 2 days. For longer storage, slice and freeze the bread in an airtight bag. It will hold its quality for about 3 months. Simply thaw at room temperature and toast it up when you’re ready to enjoy!
Kitchen Wisdom & Success Tips
- If you don’t have buttermilk, you can make a quick substitute by adding a tablespoon of lemon juice or vinegar to a cup of milk and letting it rest for 5-10 minutes.
- Be cautious not to over-knead the dough; it should remain slightly sticky for the best texture.
- Feel free to add herbs, cheese, or even dried fruit to the dough for flavor variations!
Flavor Variations & Adaptations
Want to put a twist on your soda bread? Try incorporating additional flavorings such as:
- Dried cranberries or raisins for a touch of sweetness.
- Sharp cheddar or fresh herbs for a savory loaf.
- Experiment with different types of flour, like whole wheat or spelt, to enhance the nutrition profile of the bread.
Reader Questions & Solutions
-
Why isn’t my bread rising?
- Ensure your baking soda is fresh! Old baking soda may not provide enough leavening power.
-
Can I use regular milk instead of buttermilk?
- Absolutely! Just add a tablespoon of lemon juice or vinegar to a cup of regular milk and let it sit for a few minutes to create a buttermilk substitute.
-
How do I know when the bread is done?
- It should have a golden brown crust and sound hollow when tapped on the bottom.
-
Can I make this bread gluten-free?
- Yes! Substitute the all-purpose flour with a gluten-free baking blend, but check if it includes xantham gum for the best result.
-
Is it okay to let the dough sit before baking?
- While it’s best to bake immediately after forming the dough, you can let it rest for a short time if needed, though it might slightly affect the bread’s rise.
Wrapping Up
Irish Soda Bread is more than just a recipe; it’s a piece of history and warmth that fills your heart and your tummy. It’s the sort of bread that evokes memories and creates new ones with every bake. So gather your ingredients, tie on your apron, and let’s make some magic in the kitchen. Happy baking!
PrintIrish Soda Bread
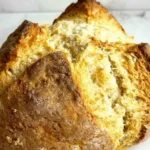
A simple yet enchanting loaf of Irish Soda Bread that is perfect for any baking skill level.
- Prep Time: 15 minutes
- Cook Time: 35 minutes
- Total Time: 50 minutes
- Yield: 8 servings 1x
- Category: Bread
- Method: Baking
- Cuisine: Irish
- Diet: Vegetarian
Ingredients
- 4 cups all-purpose flour
- 1 teaspoon baking soda
- 1 teaspoon salt
- 1 3/4 cups buttermilk
- 2 tablespoons sugar
- 2 tablespoons melted butter
Instructions
- Preheat your oven to 425°F (220°C) and prepare a baking sheet.
- Mix the dry ingredients in a large bowl: flour, baking soda, salt, and sugar.
- Create a well in the center and add buttermilk and melted butter.
- Mix until a soft dough forms.
- Knead gently on a floured surface for about 30 seconds.
- Shape the dough into a round loaf and place it on the prepared baking sheet.
- Score the top with a deep cross using a sharp knife.
- Bake for 30-35 minutes until golden brown and sounds hollow when tapped.
- Cool on a wire rack before slicing.
Notes
Serve warm with butter and jam, and store leftovers wrapped at room temperature for up to 2 days.
Nutrition
- Serving Size: 1 slice
- Calories: 170
- Sugar: 1g
- Sodium: 290mg
- Fat: 5g
- Saturated Fat: 3g
- Unsaturated Fat: 2g
- Trans Fat: 0g
- Carbohydrates: 29g
- Fiber: 1g
- Protein: 5g
- Cholesterol: 0mg